Java Web Service Ssl Example
1. Introduction
In this example, we will show how to configure HTTPS on a JAX-WS web service and client.
Hypertext Transfer Protocol Secure (or HTTPS) is an enhanced version of the HTTP protocol. It adds a layer of security to connections between a client (for example, a web browser or email client) and a server.
HTTPS uses encryption for protecting data during transmission. This is typically accomplished with the Secure Socket Layer (SSL) or Transport Layer Security (TLS) protocols. (The SSL protocol has been deprecated. TLS is the successor to SSL.)
The case for using HTTPS is two-fold:
It allows the client to confirm that the server it is communicating with is genuine and trustworthy. This is done by authenticating the server's digital certificate through a process called a "handshake".
- Once a session has been established, further data transfers between the client and server are encrypted and private using a 'shared-key". The key is generated based on a shared secret that was agreed upon during the handshake process.
- The handshake process itself uses a public key that resides with the client and a private key that resides on the server. The public key is shared by the server and contains a digital certificate.
In Java, keys are stored in a Java Keystore file (JKS). A keystore is a repository that functions as a container for key entries. The public key entry is stored in a trust keystore on the client side and is used to encrypt data during the handshake process. The private key is securely stored on the server side in a key-pair keystore and is used to decrypt the data.
In this example, we will demonstrate how to create and install keystores and certificates in web service and client applications. We will then show how to configure HTTPS on both the service and the client. This example uses the Apache CXF libraries for JAX-WS.
1.1 Tools Used in this Example
- Eclipse Java EE IDE for Java Developer 2018-12
- Maven 3.3.9 (Embedded in Eclipse)
- Apache CXF 3.2.7
- Spring Tools 4 – for Spring Boot
- Tomcat 9.0
Spring Tools 4 for Spring Boot is a set of plugins for Eclipse that support building and running Spring Boot applications. You can add Spring Tools 4 to your existing Eclipse installation by going to the Eclipse Marketplace and searching for "Spring Tools 4".
2. JAX-WS HTTPS Example
2.1 Download the Archive
Begin by downloading the JAX-WS-HTTPS zip from the download section and extracting it to a folder of your choice.
2.2 Import the Web Service and Client Starter Projects
Click File -> Import… and selectProjects from Folder or Archive. ClickNext.

Click on theArchive… button and select the soapwebservice.zip file from the folder where the archive was extracted. Select the Eclipse project from the list and clickFinish.
Import the Eclipse Project
Using the same procedure, import the soapwebclient project from the soapwebclient.zip file into your workspace.
2.3 Test the Web Service and Client
Right-click thesoapwebserviceproject in Project Explorer and selectRun As > Spring Boot App. to start the web service.
Similarly, right-click the soapwebclient project and select
Run As > Spring Boot App to run the client. You will see a successful response in the console. Web Service Client Output
Quote of the day: I think therefore I am
2.4 Create the Keystore and Digital Certificate
The Java JDK ships with a keytool utility used to generate and manage keystores and certificates. Let's generate a public/private key pair for the server keystore with the genkeypair command. Open a command prompt in a temp folder and run the following command.
keytool -genkeypair -alias server-keypair -keyalg RSA -keysize 2048 -validity 3650 -dname "CN=localhost,O=javacodegeeks.com" -keypass server-key-pass -keystore server-keystore.jks -storepass server-store-pass
This will create a keystore with with a key pair entry. The table below describes the arguments used.
| Argument | Description |
| alias | The name of the key pair entry. |
| keyalg | Specifies the algorithm to be used. |
| keysize | Specifies the size of the key in number of bytes. |
| validity | Specifies the number of days this certificate will be valid |
| dname | Specifies the Distinguished Name (as defined by the X. 500 standard) to be associated with the key entry. It is used in the issuer and subject fields of the self-signed certificate. |
| keypass | The password for the private key. |
| keystore | The name of the keystore file where the key pair will be stored. |
| storepass | The password for the keystore. |
Notice that we are using "localhost" as the common name (cn) for the Distinguished Name. We do this for the purpose of testing in our local environment. In a production environment, keys signed by a third-party certificate authority (CA) would typically be used.
Before we can create the client-side truststore, we will need to export the public key certificate of the server's key pair with the -exportcert command. This is accomplished with the following:
keytool -exportcert -alias server-keypair -file server-public-key.cer -keystore server-keystore.jks -storepass server-store-pass
The -file argument specifies the name of the public key certificate.Now we can create the client-side truststore with the -importcert command. Run the following command:
keytool -importcert -keystore client-truststore.jks -alias server-public-key -file server-public-key.cer -storepass client-truststore-pass -noprompt
This creates a truststore named client-truststore.jks that contains the previously exported public key certificate. The arguments used are described in the table below.
| Argument | Description |
| alias | The name of the trusted certificate entry. |
| file | The name of the certificate file to be imported into the trusted certificate entry. |
| storepass | The password for the keystore. |
| noprompt | Skips prompting the user to verify the certificate. |
2.5 Setup HTTPS on the Server
2.5.1 Add Keystore and Digital Certificate to the Web Service Application
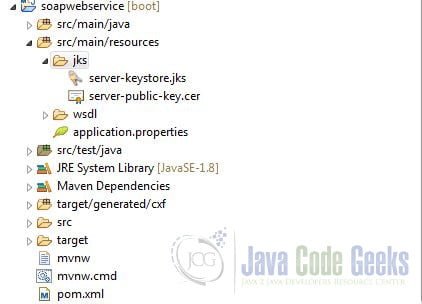
Now that we have generated the required artifacts, we can add them to the web service application. Create a folder named /jks under the /src/main/resources folder of the soapwebservice server application. Copy the server keystore and public key certificate files from the temp directory and paste them in the /jks folder.
2.5.2 Configure HTTPS on the Server
It is very easy to configure HTTPS for a Spring Boot web application. Add the following properties to the application.properties file: application.properties
server.port=9443 server.ssl.key-store=classpath:jks/server-keystore.jks server.ssl.key-store-password=server-store-pass server.ssl.key-alias=server-keypair server.ssl.key-password=server-key-pass server.servlet.context-path=/soapservice
The server is set to receive requests at port 9443, which like port 443, indicates that the HTTPS protocol is being used. Also specified are the location of keystore file, its password, the alias for the key pair entry and its password.
2.5.3 Test the Updated Web Service
Start the soapwebservice application. Open a web browser and access the web service using the new endpoint: https://localhost:9443/soapservice/services/quoteService?wsdl
The browser will warn that the connection is not secure or private. The reason for this is that we are using self-signed certificate, which are untrusted by most browsers. Proceed by clicking the "Advanced" button and adding an exception. The WSDL file will be displayed in your browser as a result.
2.6 Setup HTTPS on the Client
2.6.1 Add the Trust Store to the Client Application
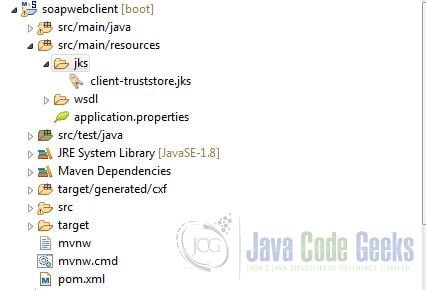
Let's begin by adding the trust store to the client application. Create a folder named /jks underneath the /src/main/resources folder of the soapwebclient application. Copy the client trust store file from the temp directory and paste it in the /jks folder.
2.6.2 Create the SSL Context
The next step is to create the SSL context. Create a new method called createSSLContext in SoapwebclientApplication.java with the following code: SoapwebclientApplication.java
import java.security.KeyStore; import java.security.SecureRandom; import javax.net.ssl.SSLContext; import javax.net.ssl.TrustManagerFactory; import org.springframework.boot.CommandLineRunner; import org.springframework.boot.SpringApplication; import org.springframework.boot.autoconfigure.SpringBootApplication; @SpringBootApplication public class SoapwebclientApplication implements CommandLineRunner { public static void main(String[] args) { SpringApplication.run(SoapwebclientApplication.class, args); } @Override public void run(String... args) throws Exception { RandomQuoteService service = new RandomQuoteService(); RandomQuote port = service.getRandomQuotePort(); System.out.println("Quote of the day: " + port.getQuote()); } private SSLContext createSSLContext() throws Exception { // Create and load the truststore KeyStore trustStore = KeyStore.getInstance("JKS"); trustStore.load(SoapwebclientApplication.class.getClassLoader().getResourceAsStream("jks/client-truststore.jks"), "client-truststore-pass".toCharArray()); // Create and initialize the truststore manager TrustManagerFactory tmf = TrustManagerFactory.getInstance("SunX509"); tmf.init(trustStore); // Create and initialize the SSL context SSLContext sslContext = SSLContext.getInstance("SSL"); sslContext.init(null, tmf.getTrustManagers(), new SecureRandom()); return sslContext; } } First, we initialize a KeyStore of type JKS (Java Keystore). We then load the keystore with the contents of the client-truststore.jdk file using the classloader of the Spring Boot application class. We also supply the password as the file is password-protected.
Next, we create a TrustManagerFactory that uses the SunX509 algorithm. The TrustManagerFactory is used to create a TrustManager. (A trust manager uses the information contained in a trust store to make trust decisions, such as whether certificates presented by a server should be accepted.) We can create a trust manager for our trust store by using the TrustManagerFactory.init method.
The last step is to create an SSLContext and initialize it with our trust manager that we retrieved from the TrustManagerFactory.
2.6.3 Override the Endpoint Address and Set the TLS Client Parameters
Now we will override the endpoint address and set the TLS client parameter. Modify the run method in SoapwebclientApplication.java as follows: SoapwebclientApplication.java
import java.security.KeyStore; import java.security.SecureRandom; import javax.net.ssl.SSLContext; import javax.net.ssl.TrustManagerFactory; import javax.xml.ws.BindingProvider; import org.apache.cxf.configuration.jsse.TLSClientParameters; import org.apache.cxf.endpoint.Client; import org.apache.cxf.frontend.ClientProxy; import org.apache.cxf.transport.http.HTTPConduit; import org.springframework.boot.CommandLineRunner; import org.springframework.boot.SpringApplication; import org.springframework.boot.autoconfigure.SpringBootApplication; @SpringBootApplication public class SoapwebclientApplication implements CommandLineRunner { public static void main(String[] args) { SpringApplication.run(SoapwebclientApplication.class, args); } @Override public void run(String... args) throws Exception { RandomQuoteService service = new RandomQuoteService(); RandomQuote port = service.getRandomQuotePort(); // Override the endpoint address BindingProvider provider = (BindingProvider)port; provider.getRequestContext().put( BindingProvider.ENDPOINT_ADDRESS_PROPERTY, "https://localhost:9443/soapservice/services/quoteService"); // Get the underlying http conduit of the client proxy Client client = ClientProxy.getClient(port); HTTPConduit http = (HTTPConduit) client.getConduit(); // Set the TLS client parameters TLSClientParameters parameters = new TLSClientParameters(); parameters.setSSLSocketFactory(createSSLContext().getSocketFactory()); http.setTlsClientParameters(parameters); System.out.println("Quote of the day: " + port.getQuote()); } private SSLContext createSSLContext() throws Exception { // Create and load the truststore KeyStore trustStore = KeyStore.getInstance("JKS"); trustStore.load(SoapwebclientApplication.class.getClassLoader().getResourceAsStream("jks/client-truststore.jks"), "client-truststore-pass".toCharArray()); // Create and initialize the truststore manager TrustManagerFactory tmf = TrustManagerFactory.getInstance("SunX509"); tmf.init(trustStore); // Create and initialize the SSL context SSLContext sslContext = SSLContext.getInstance("SSL"); sslContext.init(null, tmf.getTrustManagers(), new SecureRandom()); return sslContext; } } The BindingProvider interface provides access to standard properties used in request and response messages. Here we are using it to set the endpoint address property for request messages.
We then use the ClientProxy.getClient static method to cast our client proxy (the RandomQuote port) to a CXF Client. (Since we are using CXF, JAX-WS endpoints and client proxies are implemented on top of CXF APIs.)
We use the Client interface to retrieve an HTTPConduit, which is used to handle the https protocol. (A Conduit channels transport-level messages between the client and server.)
Finally, we initialize the TLSClientParameters object and set its SSLSocketFactory from the SSLContext that we create from the call to the createSSLContext method. These parameters will be used by the underlying conduit for creating secure socket connections.
2.7 Test the HTTPS Client
Right-click the soapwebclient project and select
Run As > Spring Boot App. You will see a successful response in the console. Web Service Client Output
Quote of the day: I think therefore I am
3. JAX-WS HTTPS Example – Summary
In this example, we demonstrated how to configure HTTPS on a JAX-WS web service and client.
4. Download the Source Code
This was a JAX-WS HTTPS Example.
Download
You can download the full source code of this example here:JAX-WS HTTPS Example
Source: https://examples.javacodegeeks.com/enterprise-java/jws/jax-ws-https-example/
0 Response to "Java Web Service Ssl Example"
Post a Comment